

How to Thread a Singer Sewing Machine
How to thread a Singer sewing machine
Threading a Singer sewing machine might seem like a daunting task at first, but it doesn’t need to be that way. The exact process for threading a Singer machine will vary depending on the model of the machine that you have, so it is always best to check the instruction manual or find more information on the manufacturer’s website if you’ve lost it.
This guide covers how to thread a Singer sewing machine with the Main configuration. Follow these links for guides on how to thread the Alternate, Curvy and Futura configurations.
Quick tips
- Always raise the presser foot lifter before getting started
- Make sure the thread is properly placed in the take-up lever
- Use a spool cap to stop the thread catching on any irregularities on the spool itself. If the machine came with multiple sizes, use the spool cap that most closely fits the thread spool.
- Always make sure that you are using the correct size and type of needle for your fabric. The wrong needle could cause the thread to shred or break apart.
Threading a Singer - main configuration
|
Step 1 Step 2 Step 3
|
|
|
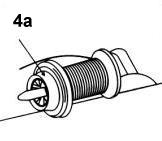
Step 4: Horizontal threading |
|
|
Step 4: Vertical threading |
|
|
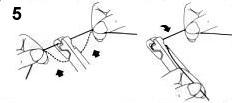
Step 5 Lead the thread, passing it first through the lower slot on the underside of the thread guide. Next, pass it through the upper slot, leading the thread over and around to the right. Pull the thread into the thread guide. |
|
|
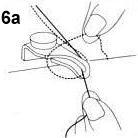
Step 6a |
|
|
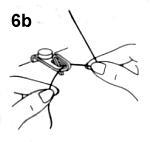
Step 6b |
|
|
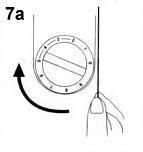
Step 7a |
|
|
Step 7b |
|
|
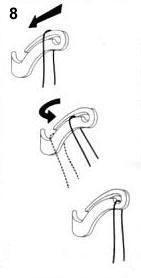
Step 8 |
|
|
Step 9 |
|
|
Step 10 |
|


 Item Successfully Added